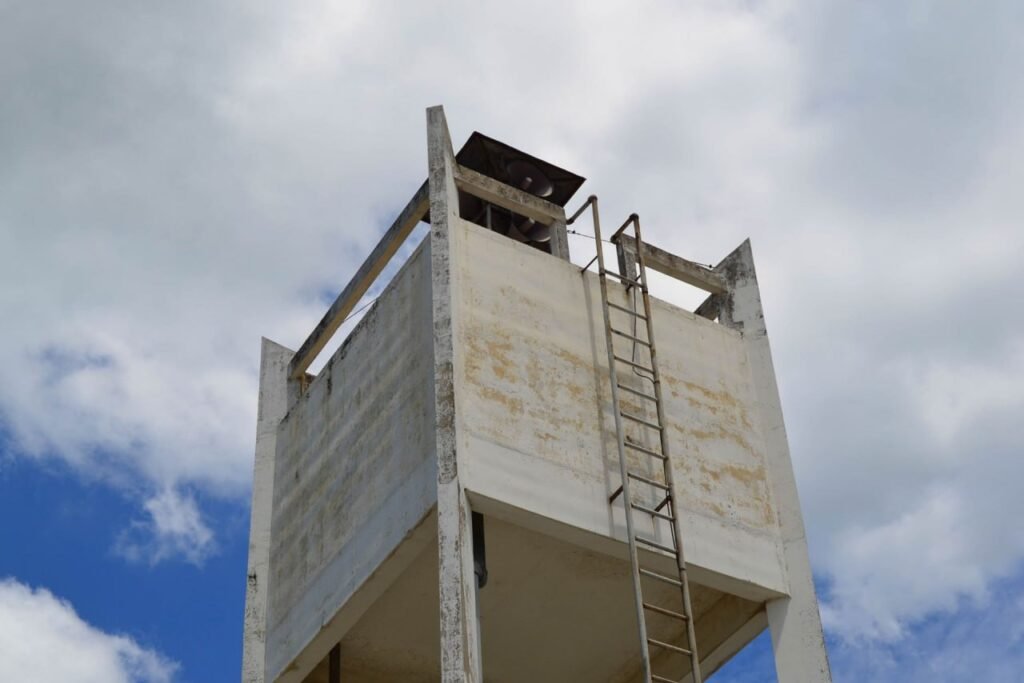
Welcome to our comprehensive guide on how to fix a leaking concrete water tank in New Zealand. Maintaining a water-tight tank is crucial for preserving your water supply and preventing costly damages. Leaks can arise from various issues such as age, structural stress, poor initial construction, or environmental factors like earthquakes. In this guide, we’ll walk you through the common causes of leaks, the signs to watch out for, and the step-by-step process to repair your tank effectively. Whether you’re dealing with visible cracks or unexplained drops in water levels, this guide will provide you with the knowledge and tools you need to tackle the problem and ensure your water tank remains in excellent condition.
To fix a leaking concrete water tank in New Zealand, first, ensure the tank is empty and clean the affected area. Next, widen and clean the crack, then apply a suitable repair material such as hydraulic cement or epoxy resin. Once the repair is dry, seal the tank with a waterproofing sealant to prevent future leaks. Regular inspections and maintenance can help identify and address potential issues early.
Understanding The Problem
Repairing a leaking concrete water tank requires a thorough understanding of the underlying causes and signs. This section explores common causes of leaks and identifies key indicators to help you diagnose the problem accurately.
Common Causes of Leaks
Cracks Due to Age or Structural Stress
Over time, concrete can develop cracks due to natural aging or structural stress. As the tank ages, the concrete can weaken and become more susceptible to cracking. These cracks can create pathways for water to escape, leading to leaks. Structural stress, such as heavy loads or pressure from the stored water, can also contribute to the formation of cracks.
Poor Initial Construction
If the tank is not constructed properly from the outset, it is more likely to develop leaks. Poor construction practices, such as inadequate curing, insufficient reinforcement, or the use of substandard materials, can compromise the tank’s integrity. Ensuring a solid construction foundation is critical to prevent future leaks and prolong the tank’s lifespan.
Environmental Factors
Environmental factors, such as earthquakes or ground movement, can also cause leaks in concrete water tanks. Natural events can shift the ground beneath the tank, putting stress on the structure and causing it to crack. Additionally, changes in temperature and moisture levels can lead to the expansion and contraction of the concrete, further exacerbating the problem.
Signs of a Leaking Tank
Visible Cracks or Damp Patches
One of the most obvious signs of a leaking tank is the presence of visible cracks or damp patches on the surface. These can appear as hairline fractures or more significant gaps in the concrete. Damp patches around the tank indicate that water is escaping and seeping into the surrounding area. Regularly inspecting the tank for these signs can help catch leaks early before they worsen.
Unexplained Drop in Water Levels
If you notice an unexplained drop in the water level within the tank, it could be a sign of a leak. This drop can occur even when there has been no significant water usage or evaporation. Monitoring the water levels and noting any sudden or consistent decreases can help identify a potential leak.
Algae Growth Around the Tank
Algae growth around the tank is another indicator of a leak. When water escapes from the tank, it creates a damp environment that is conducive to algae growth. If you see algae forming on or near the tank, it may be a sign that water is leaking and creating favorable conditions for algae to thrive. Regular cleaning and maintenance can help keep algae at bay and identify leaks.
Understanding these common causes and signs of a leaking tank is essential for effective diagnosis and repair. By recognizing the symptoms early, you can take the necessary steps to address the issue and prevent further damage. Proper construction, regular maintenance, and prompt repairs are key to ensuring the longevity and functionality of your concrete water tank.

Preliminary Steps
Before diving into the actual repair work for your concrete water tank, it’s crucial to follow a set of preliminary steps. These steps ensure not only the effectiveness of the repair but also the safety of those involved. Here’s a comprehensive breakdown of the necessary preliminary steps:
Safety Precautions
Safety should always be the top priority when undertaking any repair work, especially with something as crucial as a water tank. Here are the key safety precautions to follow:
Ensuring the Tank is Empty Before Starting Repairs
- It’s vital to drain the water tank completely before beginning any repair work. Working on a full or partially-filled tank can be hazardous and may lead to further damage. Ensuring the tank is empty eliminates the risk of water-related accidents and provides a clear view of the tank’s interior, making it easier to identify and address the issue.
- Draining the tank also prevents contamination of your water supply. Any repair materials or debris should not mix with the water you’ll eventually consume.
Using Protective Gear (Gloves, Masks, Safety Glasses)
- Personal protective equipment (PPE) is essential for safeguarding against potential injuries. Gloves protect your hands from harsh chemicals and sharp edges, while masks shield your respiratory system from dust and fumes. Safety glasses are crucial for protecting your eyes from debris and splashes of repair materials.
- Depending on the specific repair materials used, additional protective gear such as coveralls or face shields might be necessary. Always refer to the safety guidelines of the products you’re using.
Assessment
After ensuring safety measures are in place, the next step is to assess the situation. A thorough assessment helps in formulating an effective repair plan. Here’s how to proceed:
Inspecting the Tank Thoroughly to Identify the Leak’s Source
- Conduct a detailed inspection of the entire tank, paying special attention to areas commonly prone to leaks, such as seams, joints, and the tank’s base. Use a flashlight to get a clear view of all the nooks and crannies.
- If the leak is not immediately apparent, you might need to perform a dye test. This involves adding a non-toxic dye to the water and observing where the colored water seeps out.
Determining the Extent of the Damage
- Once the leak’s source is identified, assess how extensive the damage is. A small crack or hole might only require a simple patch, while more significant damage could necessitate extensive repairs or even professional intervention.
- Note the size, depth, and location of the cracks or holes. Take pictures and measurements, as these will help in determining the amount of repair material needed and in explaining the problem to a professional if necessary.
By meticulously following these preliminary steps, you set a solid foundation for the repair work. Ensuring safety and conducting a thorough assessment not only make the repair process smoother but also increase the likelihood of a long-lasting fix. Remember, taking the time to properly prepare can save you from headaches and additional costs down the line.

Materials And Tools Needed
When it comes to repairing a leaking concrete water tank, having the right materials and tools at hand is crucial for a successful job. Let’s break down what you’ll need in detail.
List of Materials
- Waterproofing Sealant: This is essential for ensuring that the repaired area remains watertight. A high-quality waterproofing sealant will help protect the concrete from future leaks and water damage. Make sure to choose one that is suitable for use with concrete and is resistant to the tank’s water content, whether it’s potable water or otherwise.
- Concrete Patch Mix: This material is used to fill in any cracks or holes in the concrete. A good concrete patch mix is durable and designed specifically for repairing damaged concrete surfaces. It’s important to follow the manufacturer’s instructions on how to mix and apply it for the best results.
- Epoxy Resin: Known for its strong adhesive properties, epoxy resin is used to bond the concrete patch to the existing tank surface. It creates a solid, waterproof seal that prevents leaks from reoccurring. Epoxy resins are particularly useful for repairing larger cracks or holes in the tank.
- Hydraulic Cement: This type of cement is designed to set quickly and expand as it hardens, making it ideal for stopping active leaks. Hydraulic cement is perfect for emergency repairs where the leak needs to be stopped immediately. It bonds well to wet surfaces and creates a durable seal.
List of Tools
- Wire Brush: This tool is used to clean the surface of the concrete tank before applying any repair materials. A wire brush helps remove any loose debris, dirt, or old sealant that might prevent new materials from adhering properly.
- Chisel and Hammer: These are used to chip away any damaged or weakened concrete. By removing the compromised material, you ensure that the patch mix and sealant can bond to a solid, stable surface. This step is critical for the longevity of the repair.
- Trowel: A trowel is used to apply and smooth the concrete patch mix. It allows you to spread the material evenly and ensure it fills all cracks and holes properly. A good trowel technique helps achieve a professional finish.
- Paintbrush or Roller: These are used to apply the waterproofing sealant. Depending on the size of the area being sealed, a paintbrush might offer more precision, while a roller can cover larger areas more quickly. It’s important to apply the sealant evenly to ensure complete coverage.
- Safety Equipment: Safety should always be a priority when working with concrete and repair materials. Protective gloves, safety glasses, and a dust mask are essential to protect your skin, eyes, and lungs from potential hazards. Additionally, wearing sturdy work boots and appropriate clothing can help prevent injuries.
Having these materials and tools prepared before starting the repair process will make the job smoother and more efficient. Ensuring you have high-quality products and the right equipment will contribute to a more durable and long-lasting repair of your concrete water tank.

Step-By-Step Repair Guide
Repairing a leaking concrete water tank requires a systematic approach to ensure durability and prevent future leaks. Below is a detailed step-by-step guide designed to help you achieve a long-lasting repair. Follow these steps carefully to restore your water tank’s integrity.
Cleaning the Tank
Removing Dirt and Debris from the Surface
Begin by thoroughly cleaning the surface of the tank. Remove all dirt, algae, and debris. This initial cleaning step is crucial as it ensures that the repair materials adhere properly. Use a high-pressure washer or a stiff brush to scrub the surface. Pay special attention to areas around the cracks to ensure they are free of any loose material that might hinder the repair process.
Scrubbing the Affected Area with a Wire Brush
Once the general cleaning is complete, focus on the specific area around the crack. Use a wire brush to scrub the crack and the surrounding surface. This helps to remove any remaining dirt, old paint, or sealant, providing a clean and rough surface for the repair material to bond with. Be thorough in this step to ensure maximum adhesion.
Preparing the Crack
Widening and Deepening the Crack with a Chisel for Better Adhesion
To ensure the repair material fills the crack effectively, use a chisel to widen and deepen it slightly. This process is called keying the crack. By creating a wider base, you provide more surface area for the repair material to grip onto, resulting in a stronger bond. Be careful not to make the crack too wide; a slight widening is sufficient.
Cleaning Out Dust and Loose Particles
After chiseling, clean out the crack thoroughly. Use a brush or compressed air to remove dust, debris, and loose particles. This step is vital because even small particles can prevent the repair material from adhering properly. Ensure the crack is completely clean and dry before moving on to the next step.
Applying the Repair Material
Mixing and Applying Hydraulic Cement for Structural Cracks
For structural cracks that compromise the tank’s integrity, use hydraulic cement. Mix the cement according to the manufacturer’s instructions until it reaches a putty-like consistency. Apply the cement into the crack using a trowel, pressing firmly to ensure it fills the entire crack. Smooth the surface and allow it to be set as per the product guidelines.
Using Epoxy Resin for Hairline Cracks
For hairline cracks, epoxy resin is the best choice. Mix the resin and hardener according to the instructions. Apply the epoxy resin to the crack using a small brush or applicator. Ensure the resin penetrates the crack fully and covers the surrounding area slightly to create a strong seal. Allow it to cure completely before proceeding.
Applying Concrete Patch Mix for Larger Damaged Areas
For larger areas of damage, a concrete patch mix is required. Mix the patch material as directed and apply it to the damaged area using a trowel. Press it firmly into place, ensuring all voids are filled. Smooth the surface with the trowel and allow it to cure as specified by the manufacturer.
Sealing the Tank
Applying Waterproof Sealant Over the Repaired Areas
After the repair materials have cured, apply a waterproof sealant to the entire area. Use a brush or roller to apply an even coat of sealant over the repaired cracks and surrounding surfaces. This step is crucial to prevent future leaks by creating an additional barrier against water infiltration.
Ensuring Even Coverage to Prevent Future Leaks
Make sure to cover the repaired areas thoroughly with the sealant, extending beyond the cracks to ensure a complete seal. Apply multiple coats if recommended by the sealant manufacturer, allowing each coat to dry fully before applying the next. Proper sealing is essential for the longevity of your repair and the prevention of future leaks.
By following this step-by-step guide, you can effectively repair a leaking concrete water tank and extend its lifespan. Regular maintenance and inspections will help identify and address potential issues before they become major problems.

Curing And Final Inspection
Curing Process
The curing process is a crucial step in ensuring the longevity and effectiveness of your concrete repair. Adequate curing allows the repair materials to achieve their full strength and durability. Here’s a detailed look at what this involves:
Allowing Adequate Time for Curing
- Once you’ve applied the repair materials, it’s essential to allow them sufficient time to cure. Curing times can vary depending on the type of repair material used and environmental conditions. Typically, this can range from a few days to a few weeks. Patience during this phase ensures that the repair materials bond correctly and develop the necessary strength.
Keeping the Area Moist
- Maintaining moisture in the repair area is critical. Concrete curing is a chemical reaction that requires water, and keeping the area moist helps prevent the repaired sections from drying out too quickly. This can be achieved by covering the area with wet burlap, plastic sheeting, or using a fine mist spray to keep the surface damp. Proper moisture maintenance ensures that the repair material cures uniformly and gains the desired properties.
Inspection
After the curing process, a thorough inspection is necessary to confirm the success of the repair and to identify any potential issues that need addressing.
Checking for Signs of Weakness
- Inspect the repaired areas meticulously. Look for any signs of cracks, spalling, or other weaknesses that might have developed during the curing process. These could be indicators that the repair hasn’t been set correctly or that there are underlying issues that need further attention. Using tools like a hammer or a chisel can help you detect any areas that sound hollow or appear fragile, indicating incomplete bonding.
Filling the Tank and Monitoring for Leaks
- Once you’re confident in the structural integrity of the repair, proceed to fill the tank with water. This is the ultimate test to ensure that the repair is watertight. Fill the tank gradually and observe for any leaks or seepage. It’s advisable to monitor the tank for several days, as some leaks might not be immediately apparent. If any leaks are detected, they should be addressed promptly to prevent further damage.
By carefully managing the curing process and conducting a detailed final inspection, you ensure that your concrete repairs are effective and long-lasting. Proper curing and diligent inspection not only extend the life of the repair but also provide peace of mind knowing that the tank will perform reliably.

Preventative Measures
Maintaining a concrete water tank in good condition is crucial for its longevity and functionality. Implementing preventative measures can help you avoid costly repairs and ensure the tank remains in optimal condition. Here are some key strategies for maintaining your concrete water tank:
Regular Maintenance Tips
Inspecting the Tank Periodically for Early Signs of Damage
- Regular inspections are essential for detecting any issues early on. Periodically check the tank for cracks, leaks, or any other signs of damage. Look for areas where the concrete might be weakening or where there might be potential structural issues. Early detection allows you to address problems before they become severe, saving you time and money in the long run.
Cleaning the Tank Regularly to Prevent Algae Growth and Debris Buildup
- A clean tank is a healthy tank. Regular cleaning prevents algae growth and debris buildup, which can compromise water quality and lead to further damage. Use appropriate cleaning solutions and methods to remove any buildup from the tank’s interior. Ensure that the cleaning process is thorough but gentle enough to avoid damaging the tank’s surface.
Protective Coatings
Applying Protective Coatings to the Interior and Exterior Surfaces
- Applying protective coatings to both the interior and exterior surfaces of your concrete water tank can significantly enhance its durability. These coatings act as a barrier, protecting the concrete from water penetration, chemical damage, and environmental factors. Ensure that the coatings used are suitable for potable water tanks to maintain water safety standards.
Using Water-Resistant Paint or Sealant
- In addition to protective coatings, using water-resistant paint or sealant can provide an extra layer of protection. These materials help to seal any minor cracks or pores in the concrete, preventing water from seeping through. Choose high-quality, water-resistant products that are designed for use on concrete surfaces to ensure maximum effectiveness.
By following these preventative measures, you can significantly extend the life of your concrete water tank and maintain the quality of the water it stores. Regular maintenance and protective coatings are key to preventing damage and ensuring that your tank continues to function efficiently for years to come.

When To Call A Professional
Identifying Complex Issues
Knowing when to call a professional is crucial in maintaining your home’s structural integrity and ensuring safety. While DIY projects can be fulfilling and cost-effective, there are times when professional intervention is necessary. Identifying complex issues that are beyond your repair capabilities is the first step. For example, if you notice severe water damage, large cracks, or structural instability, these are clear signs that the problem is too significant for DIY methods. Attempting to fix such issues without the proper knowledge and tools can lead to further damage and increased costs down the line.
Benefits of Professional Services
Calling in a professional has several benefits that outweigh the initial cost. First and foremost, professionals ensure long-lasting and effective repairs. They have the expertise to accurately diagnose the problem and implement the best solution, which reduces the risk of recurring issues. Moreover, professionals have access to specialized tools and equipment that are not typically available to the average homeowner. This means they can handle repairs more efficiently and safely.
In addition to technical skills, professionals bring years of experience to the table. They can foresee potential problems that might not be apparent to an untrained eye, preventing future damage. Hiring a professional also saves you time and effort, allowing you to focus on other important tasks. Lastly, reputable professionals often provide warranties for their work, giving you peace of mind knowing that your home is in good hands.
In conclusion, while DIY repairs can be suitable for minor issues, recognizing when to call a professional can save you time, money, and stress. The benefits of professional services, such as effective and long-lasting repairs, access to specialized tools, and expert knowledge, make it a wise investment for complex problems. Always consider the extent of the damage and the potential risks before deciding whether to tackle a repair yourself or seek professional assistance.

FAQs: About How To Fix Leaking Concrete Water Tank NZ
Conclusion
Repairing a leaking concrete water tank involves several crucial steps, including identifying the leak, cleaning the tank, preparing the surface, applying sealant, and conducting a final inspection to ensure the leak is fixed. Regular maintenance and early detection are vital to prevent minor issues from becoming major problems, saving both time and money in the long run. We encourage you to take action now to repair your tanks, ensuring their longevity and efficiency. Don’t hesitate to leave comments or questions for further assistance we’re here to help you maintain your water tank in top condition.
About the Author:
Mike Veail is a recognized digital marketing expert with over 6 years of experience in helping tradespeople and small businesses thrive online. A former quantity surveyor, Mike combines deep industry knowledge with hands-on expertise in SEO and Google Ads. His marketing strategies are tailored to the specific needs of the trades sector, helping businesses increase visibility and generate more leads through proven, ethical methods.
Mike has successfully partnered with numerous companies, establishing a track record of delivering measurable results. His work has been featured across various platforms that showcase his expertise in lead generation and online marketing for the trades sector.
Learn more about Mike's experience and services at https://theleadguy.online or follow him on social media:
