Welcome to our comprehensive guide on subsoil drainage system design and installation in New Zealand. In this post, we will explore the importance of proper drainage for maintaining the health and value of your property. Subsoil drainage systems play a crucial role in preventing waterlogged soil, basement flooding, and persistent dampness, all of which can lead to significant structural issues and costly repairs. By understanding the key components and steps involved in designing and installing an effective subsoil drainage system, you can ensure your property remains dry and secure. Whether you’re a homeowner or a professional, this guide aims to provide you with valuable insights and practical tips to help you make informed decisions about your drainage needs.
A subsoil drainage system in New Zealand is essential for preventing waterlogged soil and protecting property foundations from water damage. It involves assessing the site, planning the layout, selecting appropriate materials like pipes and drainage aggregate, and ensuring proper installation with correct slope and backfilling techniques. Professional installation is recommended for optimal results, offering long-term benefits and maintenance tips to keep your system functioning effectively.
- Understanding Subsoil Drainage Systems
- Assessing The Need For Subsoil Drainage
- Designing A Subsoil Drainage System
- Installation Process
- Common Challenges And Solutions
- Benefits Of Professional Installation
- Case Studies And Testimonials
- FAQs: About Subsoil Drainage System Design And Installation NZ
- What is a subsoil drainage system?
- Why are subsoil drainage systems important in New Zealand?
- How do I know if my property needs a subsoil drainage system?
- What factors should be considered in the design of a subsoil drainage system?
- What materials are used in a subsoil drainage system?
- Can I install a subsoil drainage system myself?
- What are the common challenges during the installation of a subsoil drainage system?
- How do I maintain a subsoil drainage system?
- How long does a subsoil drainage system last?
- How much does it cost to install a subsoil drainage system in New Zealand?
- Conclusion
Understanding Subsoil Drainage Systems
What is a Subsoil Drainage System?
A subsoil drainage system, also known as a French drain or weeping tile, is a network designed to manage and redirect groundwater away from a property. This system is installed below the ground surface and is crucial in areas where water accumulation can lead to soil instability and structural damage. Essentially, it works by collecting excess water from the soil and channeling it to a designated drainage area, thereby preventing waterlogging and protecting the integrity of buildings and landscapes.
Why Are Subsoil Drainage Systems Important for Properties in NZ?
In New Zealand, where heavy rainfall and diverse topography are common, subsoil drainage systems play a vital role in maintaining property stability and longevity. These systems are essential for several reasons.
1. Preventing Water Damage: Excess groundwater can lead to foundation damage, mold growth, and erosion. By effectively managing water flow, subsoil drainage systems help prevent these issues, ensuring the structural soundness of buildings.
2. Enhancing Soil Stability: Waterlogged soil can become unstable, posing risks to both structures and landscaping. Proper drainage mitigates this risk, maintaining soil integrity and supporting healthy plant growth.
3. Improving Livability: By reducing dampness and humidity around a property, subsoil drainage systems contribute to a healthier and more comfortable living environment. This is particularly important in areas prone to flooding or with high water tables.
4. Increasing Property Value: Effective drainage solutions can enhance the value of a property by ensuring it remains in good condition and free from water-related problems.
Key Components of a Subsoil Drainage System
A well-designed subsoil drainage system comprises several essential components, each playing a critical role in its effectiveness.
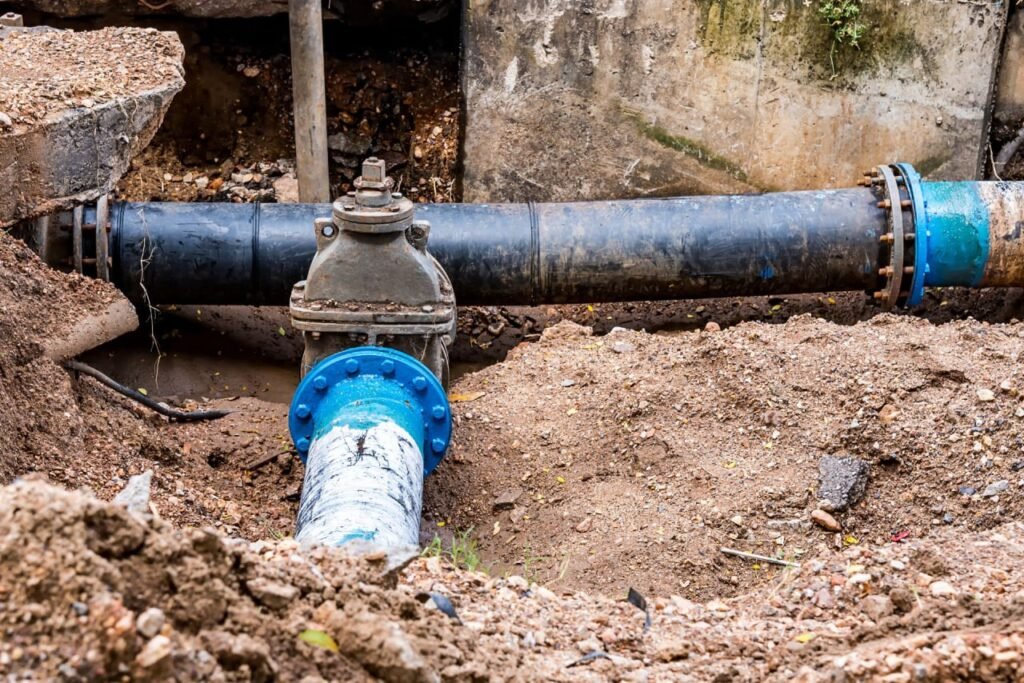
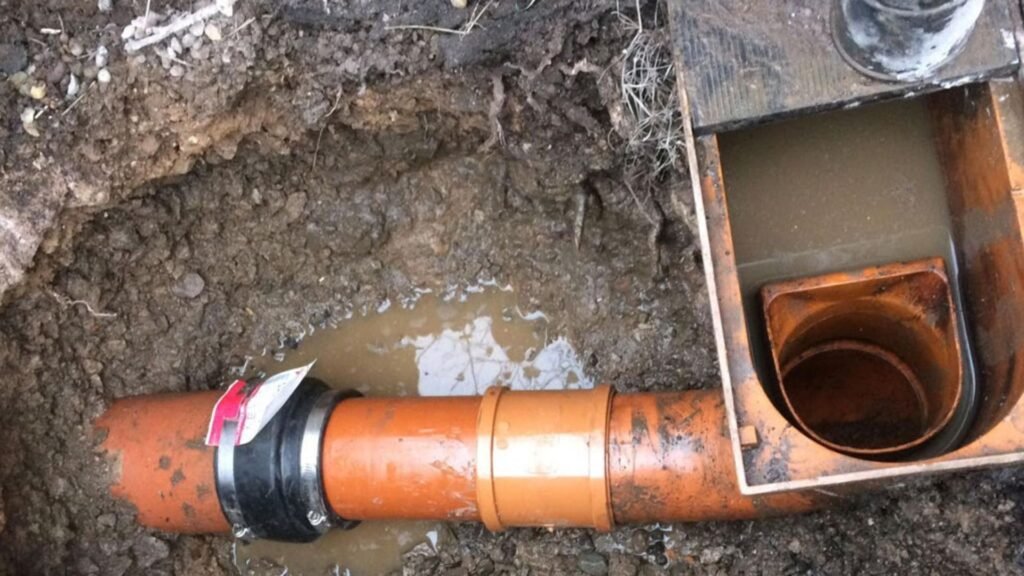
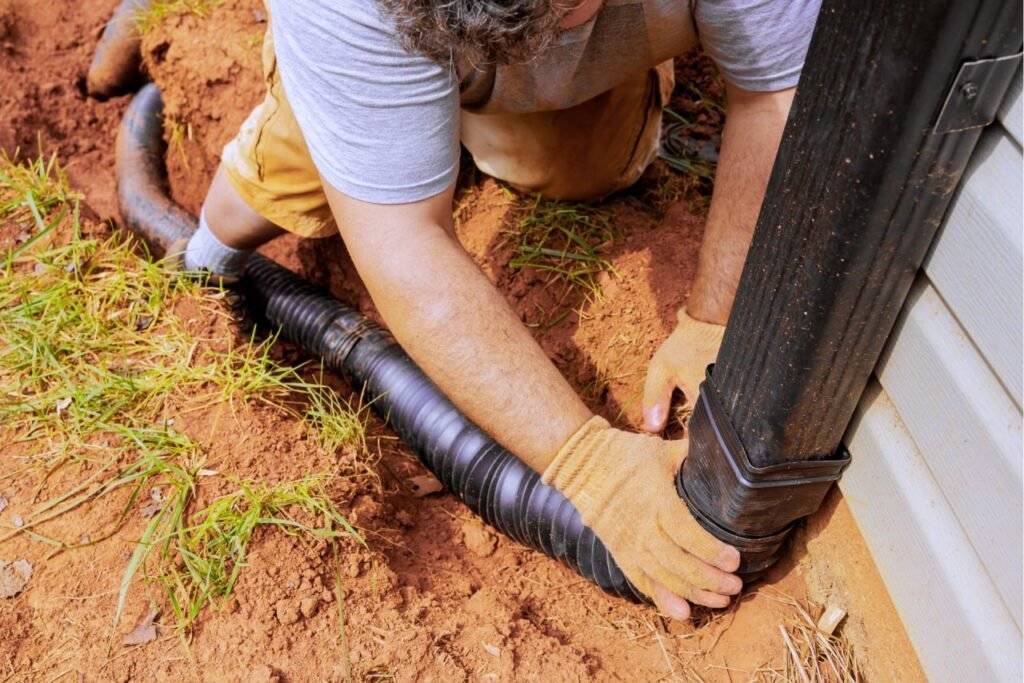
1. Pipes: Perforated or slotted pipes are installed underground to collect and transport excess water. These pipes are typically made from PVC or corrugated plastic and are laid at a gradient to facilitate water flow towards the drainage outlet.
2. Drainage Aggregate: Gravel or crushed stone is used to surround the drainage pipes. This aggregate layer helps filter out soil particles, preventing clogging while allowing water to flow freely into the pipes. It also provides structural support and ensures the stability of the drainage system.
3. Filter Fabric: Geotextile fabric, or filter fabric, is wrapped around the drainage aggregate and pipes to prevent soil and sediment from entering the system. This fabric is permeable, allowing water to pass through while keeping out debris that could cause blockages.
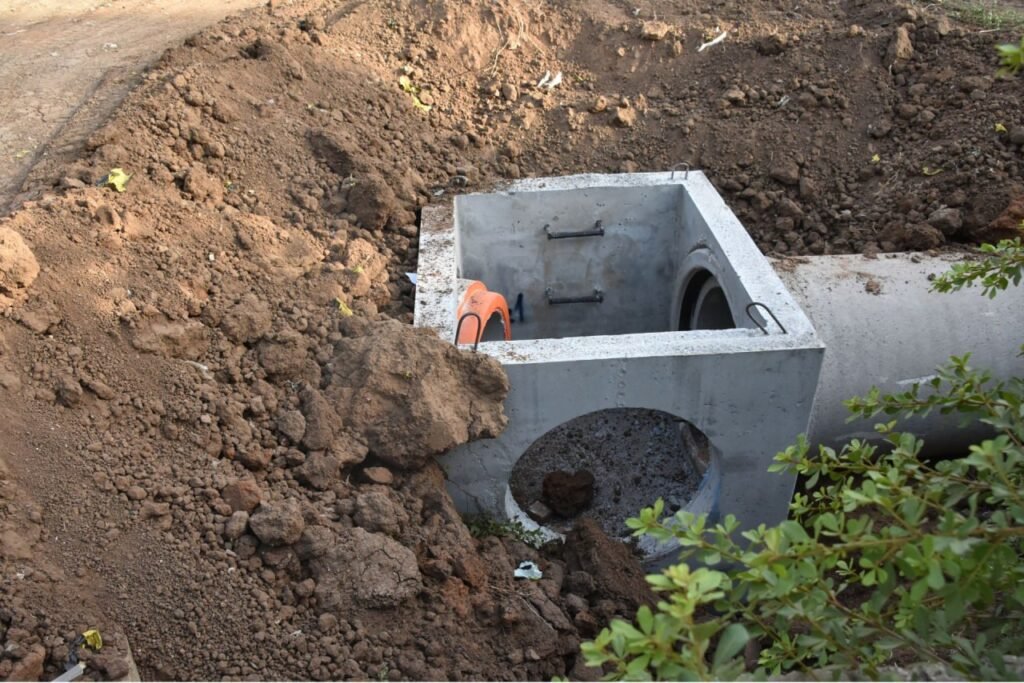
4. Outlet: The outlet is the final component of the subsoil drainage system, where the collected water is discharged. This can be a natural watercourse, a stormwater drain, or a soakaway pit. The choice of outlet depends on the property’s layout and local regulations.
Subsoil drainage systems are an indispensable part of property management in New Zealand. By understanding their definition, purpose, and key components, homeowners and builders can ensure their properties are well-protected from the adverse effects of excess groundwater. Proper installation and maintenance of these systems can lead to long-term benefits, safeguarding the structural integrity and value of properties.
Assessing The Need For Subsoil Drainage
When it comes to maintaining a property in New Zealand, understanding the need for subsoil drainage is crucial. Poor drainage can lead to a host of problems, from waterlogged soil to severe structural damage. This section will delve into the indicators of poor drainage, how different soil types affect drainage needs, and real-world case studies showcasing the benefits of subsoil drainage systems.
Indicators of Poor Drainage
Recognizing the signs of poor drainage is the first step in addressing potential problems. Here are some common indicators that a property may need subsoil drainage.
- Waterlogged Soil: One of the most obvious signs is soil that remains saturated for extended periods after rainfall. If you notice that your garden or lawn stays muddy long after the rain has stopped, it might be due to inadequate drainage.
- Basement Flooding: Persistent water intrusion in your basement is a clear sign that water is not being properly diverted away from your foundation. This can lead to mold growth, structural damage, and unhealthy living conditions.
- Persistent Dampness: If areas of your property or home remain damp regardless of the weather, it indicates poor drainage. This can manifest as damp spots on walls, musty odors, or mold growth.
- Surface Puddles: Frequent pooling of water on the surface after rain can suggest that water is not infiltrating the soil effectively, leading to surface runoff and erosion.
Soil Types and Drainage Needs
New Zealand’s diverse soil types significantly influence drainage requirements. Different soils have varying abilities to absorb and retain water, affecting how water moves through the ground.
- Clay Soils: These soils are dense and have low permeability, meaning they hold water well but drain poorly. Properties with clay soils are prone to waterlogging and often require subsoil drainage to manage excess moisture.
- Sandy Soils: Sandy soils have high permeability and drain quickly. While they rarely suffer from waterlogging, they can be prone to drought. However, in areas with high water tables, even sandy soils might need subsoil drainage.
- Silty Soils: These soils fall between clay and sandy soils in terms of drainage. They can retain moisture well but may struggle with drainage if compacted. Subsoil drainage can help in preventing surface water accumulation and root zone saturation.
- Loamy Soils: Often considered ideal for gardening, loamy soils have balanced drainage and moisture retention properties. However, in areas with poor topography or heavy rainfall, even loamy soils might benefit from additional drainage solutions.
Case Studies
Real-world examples help illustrate the practical benefits of subsoil drainage systems. Here are a few scenarios where such systems proved invaluable.
- Residential Property in Auckland: A homeowner in Auckland experienced frequent basement flooding and damp walls. After installing a subsoil drainage system, the basement remained dry, and the property value increased due to the mitigation of potential structural damage.
- Farm in Canterbury: A farm in Canterbury with clay-heavy soils faced severe waterlogging issues during the rainy season. Installing a network of subsoil drains improved soil conditions, leading to healthier crops and reduced erosion.
- Commercial Building in Wellington: A commercial building in Wellington struggled with surface water pooling in the parking lot, causing inconvenience and potential safety hazards. A subsoil drainage system effectively diverted water away, improving accessibility and reducing maintenance costs.
Understanding the need for subsoil drainage and recognizing the signs of poor drainage can save property owners from significant future expenses and damage. By considering soil types and implementing appropriate drainage solutions, you can ensure the longevity and health of your property.
Designing A Subsoil Drainage System
Designing an effective subsoil drainage system involves a series of crucial steps to ensure proper water management and prevent potential damage to your property. This section breaks down the essential components of designing a subsoil drainage system, from assessing the site to selecting the appropriate materials.
Site Assessment
The first step in designing a subsoil drainage system is conducting a thorough site assessment. This process involves several key actions.
1. Analyzing the Soil: Understanding the type of soil on your property is critical. Clay soils, for example, hold water differently than sandy soils. Soil testing can reveal important information about soil permeability and water retention characteristics.
2. Identifying Problem Areas: Walk around your property to identify low spots where water tends to accumulate. Look for signs of poor drainage, such as water pooling, muddy areas, and unhealthy vegetation.
3. Measuring Slope: The natural slope of your land influences water flow. Use tools like a level or a clinometer to measure the gradient of the terrain. Proper slope measurement helps in planning how water will move away from structures.
4. Understanding Local Climate: Consider the typical weather patterns in your area. High rainfall regions may require more robust drainage solutions compared to arid climates.
5. Checking Existing Infrastructure: Identify any existing drainage systems, including gutters, downspouts, and surface drains. Understanding how these systems interact with the subsoil drainage is crucial for a comprehensive design.
Planning
With the site assessment completed, the next phase is planning the drainage system. This involves several important considerations.
1. Determining the Drainage Path: Plan the path water will take to exit the property. This usually involves directing water to a lower elevation or a designated drainage area.
2. Calculating Flow Rates: Estimate the volume of water that needs to be managed during peak rainfall. This helps in selecting appropriate pipe sizes and system capacity.
3. Considering Slope: Ensure that the system design promotes a consistent slope, typically around 1-2%, to facilitate gravity-driven water flow.
4. Adhering to Regulations: Familiarize yourself with local building codes and regulations regarding drainage systems. Compliance with these rules is essential to avoid legal issues and ensure system effectiveness.
5. Incorporating Redundancy: Design the system with backup options to handle unexpected heavy rainfall or blockages. This can include secondary drainage paths or overflow areas.
Materials Selection
Choosing the right materials is critical for the longevity and efficiency of the subsoil drainage system. Here are the key components.
1. Pipes
- Perforated PVC Pipes: These are commonly used due to their durability and flexibility. The perforations allow water to enter the pipe while keeping soil out.
- Corrugated Pipes: These are lightweight and easy to install, making them a popular choice for residential drainage systems. Ensure they have sufficient perforations for effective drainage.
2. Aggregates
- Gravel: Select gravel with good drainage properties. Angular gravel is often preferred because it provides better stability and prevents clogging.
- Pea Gravel: While smoother than angular gravel, pea gravel can still be used effectively around pipes for drainage.
3. Filter Fabric
- Non-Woven Geotextile Fabric: This material is crucial for preventing soil particles from entering and clogging the drainage system. It wraps around the pipe and aggregates, allowing water to pass through while filtering out debris.
4. Additional Considerations
- Backfill Material: Use high-quality backfill material to cover the pipes and gravel. This should be free of debris and have good drainage properties.
- Drainage Inlets: Ensure there are adequate inlets to collect surface water and direct it into the subsoil system.
By carefully assessing the site, planning the system, and selecting the appropriate materials, you can design an effective subsoil drainage system that protects your property from water damage and ensures proper water management.
Installation Process
The installation process for drainage systems is a critical aspect that requires careful planning and execution. Here’s a detailed explanation of each step involved.
Preparation
Before you even think about installing your drainage system, it’s essential to properly prepare the site. Start by assessing the area to identify any potential obstacles such as tree roots, existing underground utilities, or rocks. Clear the site of debris and vegetation, ensuring that the ground is level and stable. This preparation stage sets the foundation for a smooth installation process.
Digging Trenches
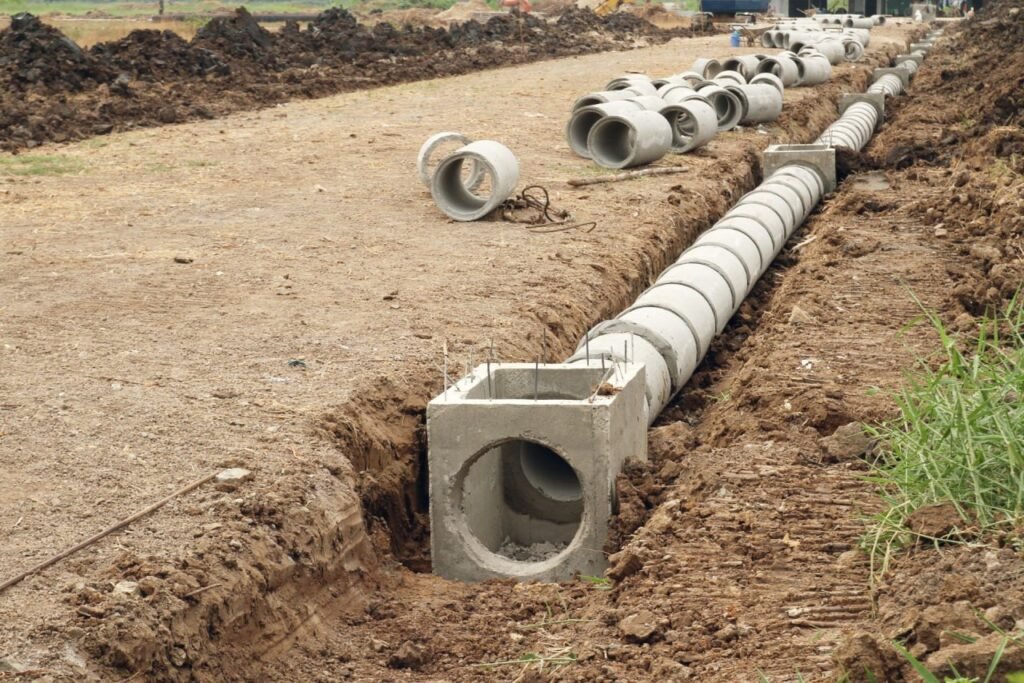
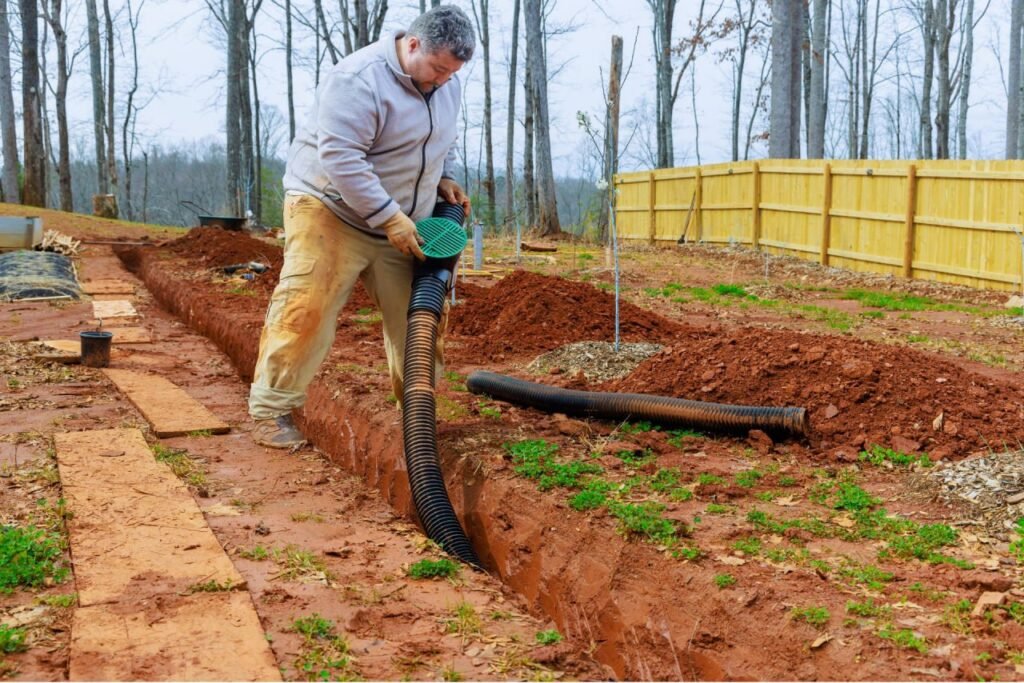
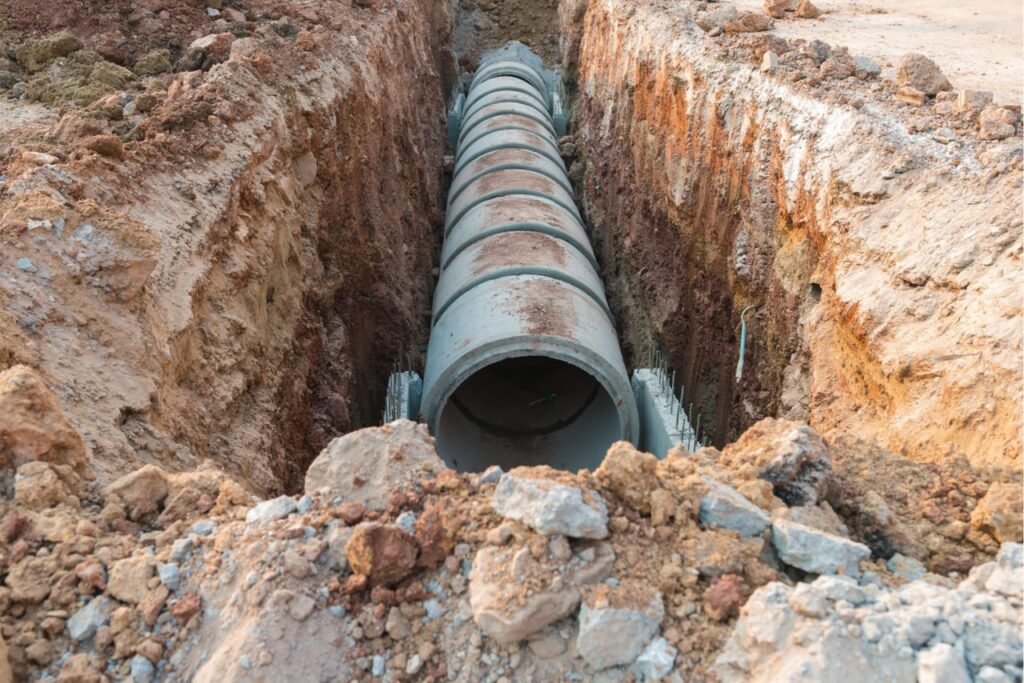
Once the site is prepared, the next step is to dig trenches for the drainage pipes. The trenches should be wide enough to accommodate the pipes and deep enough to ensure effective drainage. Typically, a trench depth of 18 to 24 inches is sufficient, but this can vary based on the specific requirements of your project. Use a trenching machine or a spade to dig, ensuring the walls of the trench are stable and the bottom is even. Proper trenching is crucial to prevent pipe displacement and ensure long-term efficiency.
Laying Pipes and Aggregates
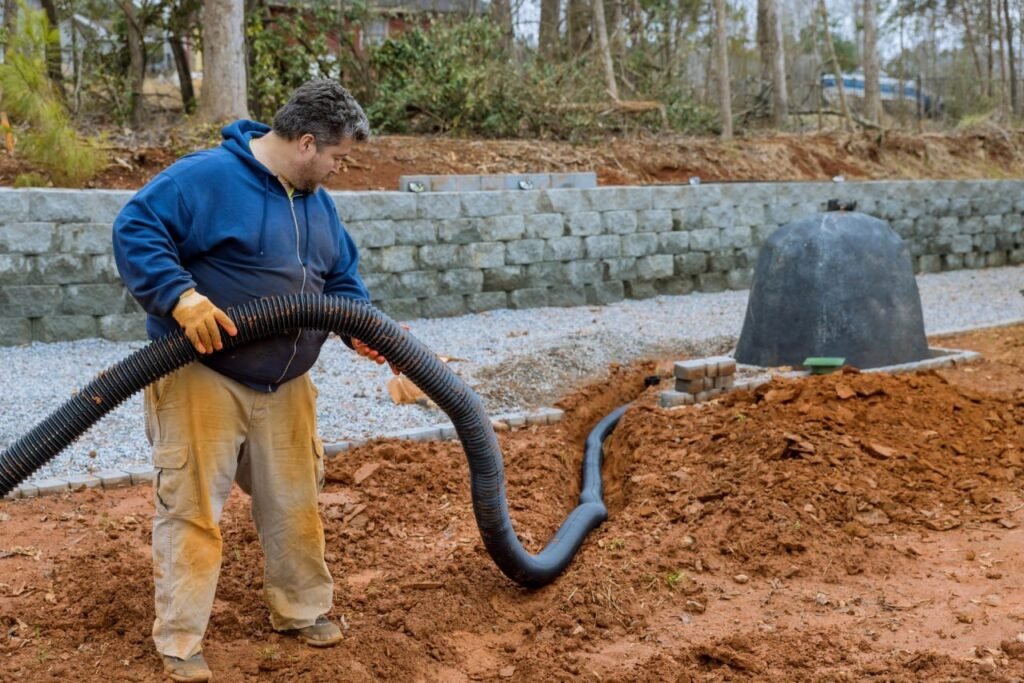
After digging the trenches, it’s time to lay the drainage pipes and add aggregates. Begin by placing a layer of gravel or crushed stone at the bottom of the trench to create a stable base. Lay the pipes on top of this base, making sure they are positioned correctly with any perforations facing downward. This orientation allows water to enter the pipes efficiently. Once the pipes are in place, cover them with more gravel or crushed stone to promote water flow and filter out debris. This layer of aggregate is essential for maintaining the functionality of the drainage system.
Ensuring Proper Slope
Ensuring the correct slope in your drainage system is vital for effective water flow. The slope should be gradual, with a recommended gradient of at least 1% (i.e., a 1-foot drop for every 100 feet of length). This slope allows gravity to assist in moving water through the pipes and away from the site. Use a level or a laser level to check the slope as you lay the pipes. Adjust the trench depth as needed to maintain a consistent gradient. Proper sloping prevents water from pooling and ensures efficient drainage.
Backfilling and Final Steps
The final steps involve backfilling the trenches and completing the installation. Carefully backfill the trench with soil, ensuring not to disturb the pipes. Compact the soil gently to avoid creating air pockets that can lead to pipe displacement. After backfilling, you may need to add a top layer of soil or sod to restore the area to its original appearance. Finally, conduct a thorough inspection to ensure all components are correctly installed and functioning. Run water through the system to check for any blockages or leaks, making any necessary adjustments.
By following these detailed steps, you can ensure a successful installation of your drainage system, providing long-term efficiency and preventing water-related issues. Proper preparation, trenching, pipe laying, slope adjustment, and backfilling are all critical components of a well-executed drainage installation process.
Common Challenges And Solutions
Installing a subsoil drainage system can present various challenges, but understanding these issues and their solutions can significantly ease the process. This section covers the common hurdles you might encounter, offers maintenance tips to prolong the system’s life, and provides troubleshooting advice to fix problems after installation.
Challenges During Installation
1. Soil Type and Condition
One of the primary challenges during the installation of a subsoil drainage system is dealing with different soil types and conditions. For instance, clay soils can be particularly difficult due to their poor drainage properties. The solution is to conduct a thorough soil analysis before starting the project. If you encounter heavy clay, consider using a gravel layer or a geotextile fabric to improve drainage efficiency.
2. Water Table Issues
High water tables can complicate installation as they may lead to waterlogging and unstable conditions. To mitigate this, you can lower the water table temporarily using sump pumps during the installation process. Additionally, installing a proper sump pit can help manage excess water effectively.
3. Proper Slope and Gradient
Ensuring the correct slope and gradient for the drainage pipes is crucial. A common mistake is not maintaining a consistent slope, which can lead to inefficient drainage. Use laser levels or string lines to check the slope continuously during installation. A general rule of thumb is to maintain a slope of 1-2% to ensure effective water flow.
Maintenance Tips
1. Regular Inspections
Routine inspections are vital to ensure your subsoil drainage system remains effective. Check for any signs of blockages or damage, especially after heavy rainfall. Regular inspections can help you spot potential issues before they escalate into major problems.
2. Cleaning and Flushing
Over time, debris and sediment can accumulate in the drainage pipes, reducing their efficiency. Periodically flushing the system with clean water can help remove these blockages. For more stubborn debris, consider using a high-pressure hose or professional cleaning services.
3. Vegetation Control
Roots from nearby trees and plants can infiltrate and clog the drainage pipes. Ensure that vegetation is kept at a safe distance from the drainage system. If roots are a persistent problem, installing root barriers or using herbicides can be effective solutions.
4. Check for Erosion
Erosion around the drainage outlets can undermine the effectiveness of the system. Reinforce these areas with gravel or erosion control fabrics to prevent soil displacement.
Troubleshooting
1. Identifying Blockages
A common post-installation problem is blockages within the drainage system. Symptoms include water pooling on the surface or slow drainage. To identify blockages, you can use a drain camera to inspect the interior of the pipes. Once identified, use appropriate tools such as drain snakes or high-pressure water jets to clear the blockage.
2. Repairing Damaged Pipes
If you notice reduced efficiency or leaks, damaged pipes might be the culprit. Excavate the area around the damaged section and replace or repair the pipe as necessary. Ensure the replacement section is properly sealed and aligned to prevent future issues.
3. Addressing Soil Movement
Soil movement can cause misalignment or damage to the drainage pipes. Regularly check the system’s alignment, especially after significant weather events. If you detect misalignment, re-adjust the pipes and ensure they are securely positioned.
4. Managing Surface Water
Sometimes, issues arise from improper surface water management rather than the subsoil system itself. Ensure that surface water is directed away from the drainage area using proper grading and additional surface drains if necessary.
By understanding and addressing these common challenges, maintaining your subsoil drainage system, and troubleshooting effectively, you can ensure its longevity and optimal performance. Regular maintenance and prompt attention to any issues will keep your system functioning efficiently for years to come.
Benefits Of Professional Installation
When it comes to installing a subsoil drainage system, hiring professionals can make a significant difference in the effectiveness and longevity of your project. Here, we explore the key benefits of opting for professional installation over a DIY approach, and provide tips on finding the best local professionals in New Zealand.
Expertise: The Advantages of Hiring Professionals
One of the primary benefits of hiring professionals for subsoil drainage system installation is their expertise. Professionals bring a wealth of knowledge and experience to the table, ensuring that the system is designed and installed correctly from the start. This expertise can prevent common pitfalls that DIY enthusiasts might encounter, such as improper slope grading, incorrect pipe placement, or inadequate backfilling.
A professionally installed system is tailored to the specific needs of your property. Experts conduct thorough site evaluations, taking into account soil type, groundwater levels, and local climate conditions. This meticulous approach ensures that the drainage system functions efficiently, reducing the risk of waterlogging, soil erosion, and foundation damage.
Cost vs. DIY: Comparing Costs and Benefits
While it might be tempting to save money by installing a subsoil drainage system yourself, the potential long-term costs of a poorly executed DIY project can far outweigh the initial savings. Professional installation might have a higher upfront cost, but it offers significant benefits that justify the investment.
Firstly, professionals use high-quality materials and advanced equipment that are often inaccessible to DIYers. This ensures the durability and reliability of the system. Secondly, professional installers are more likely to comply with local building codes and regulations, reducing the risk of legal issues or the need for costly modifications later on.
In contrast, a DIY approach can lead to errors that compromise the system’s effectiveness, potentially resulting in water damage that requires expensive repairs. Additionally, the time and effort required to learn about proper installation techniques and complete the project can be substantial. By hiring professionals, you can save time and avoid the stress associated with a complex installation process.
Local Professionals: How to Find and Choose a Reputable Subsoil Drainage System Installer in NZ
Finding a reputable subsoil drainage system installer in New Zealand is crucial for ensuring the success of your project. Here are some steps to help you choose the right professional.
1. Research and Recommendations: Start by asking friends, family, or neighbors for recommendations. Online reviews and ratings can also provide insights into the reliability and quality of local installers.
2. Check Credentials: Ensure that the installers you are considering are licensed and insured. This provides protection against any potential damages or issues that may arise during the installation process.
3. Experience and Specialization: Look for professionals with extensive experience in subsoil drainage systems. Specialists who focus on drainage solutions are more likely to deliver high-quality results.
4. Request Quotes: Obtain multiple quotes from different installers to compare prices and services. Be wary of unusually low quotes, as they might indicate subpar materials or workmanship.
5. Ask for References: Request references from past clients to get a sense of the installer’s track record. Speaking directly with previous customers can provide valuable insights into their professionalism and quality of work.
6. Site Visit and Consultation: Arrange for a site visit and consultation with the installer. This allows them to assess your property’s specific needs and provide a detailed plan and cost estimate.
By following these steps, you can find a trustworthy and skilled subsoil drainage system installer in New Zealand, ensuring a successful and hassle-free installation process.
Case Studies And Testimonials
Real-Life Examples
Case Study 1: Auckland Residential Property
In Auckland, a homeowner faced persistent waterlogging in their backyard, particularly during the rainy season. The excessive moisture not only damaged their garden but also threatened the structural integrity of their home. After consulting with a local drainage specialist, they opted for a subsoil drainage system.
The installation involved digging trenches around the property and laying perforated pipes wrapped in geotextile fabric. These pipes directed excess water away from the soil, effectively reducing the water table level. Within a few weeks, the homeowner noticed a significant improvement. The garden thrived, and the basement remained dry even after heavy rains. This case study exemplifies how a well-planned subsoil drainage system can mitigate waterlogging issues and protect property investments.
Case Study 2: Commercial Building in Wellington
A commercial building in Wellington experienced frequent basement flooding, disrupting business operations and causing significant repair costs. The building’s management decided to install a comprehensive subsoil drainage system. The project involved a detailed site assessment, followed by the installation of a network of drainage pipes and sump pumps to channel water away from the building’s foundation.
Post-installation, the building saw a drastic reduction in flooding incidents. The dry basement conditions ensured smooth business operations, saved on repair costs, and increased the property’s value. This example underscores the importance of subsoil drainage in maintaining the functionality and longevity of commercial properties.
Case Study 3: Agricultural Land in Canterbury
Farmers in Canterbury struggled with waterlogged fields, impacting crop yields and soil health. By implementing a subsoil drainage system, they were able to control the water table and enhance soil conditions. Trenches with perforated pipes were laid out strategically across the fields, directing excess water to a nearby drainage ditch.
The results were remarkable. Crop yields improved, soil erosion reduced, and the overall health of the farmland was restored. This case highlights the critical role of subsoil drainage in agricultural productivity and sustainability.
Testimonials
Customer Testimonial 1: John from Hamilton
“Installing a subsoil drainage system was the best decision I made for my property. My backyard used to be a swamp every winter, but now it’s completely dry. The team was professional and efficient, and I couldn’t be happier with the results.” – John, Hamilton
John’s testimonial reflects the common issues homeowners face and how a well-installed subsoil drainage system can resolve these problems, enhancing the quality of life and property value.
Customer Testimonial 2: Sarah from Christchurch
“We had ongoing issues with water seeping into our basement. After getting a subsoil drainage system installed, we haven’t had a single problem. The peace of mind and the savings on repair costs are invaluable.” – Sarah, Christchurch
Sarah’s experience emphasizes the cost-saving benefits and the enhanced safety and comfort provided by an effective drainage solution.
Customer Testimonial 3: Mike from Tauranga
“Our farmland was constantly waterlogged, affecting our crops. The subsoil drainage system we installed made a huge difference. Our yields are up, and the soil is healthier than ever. Highly recommend it to any farmer dealing with similar issues.” – Mike, Tauranga
Mike’s testimonial highlights the agricultural benefits, showcasing how subsoil drainage systems can significantly improve farm productivity and sustainability.
These real-life examples and testimonials provide compelling evidence of the benefits of subsoil drainage systems. They illustrate not only the technical effectiveness of these systems but also their impact on homeowners, businesses, and farmers across New Zealand.
FAQs: About Subsoil Drainage System Design And Installation NZ
What is a subsoil drainage system?
A subsoil drainage system is designed to remove excess water from the soil below the surface, preventing waterlogging and protecting building foundations and other structures from water damage. It typically consists of perforated pipes, drainage aggregate, and filter fabric.
Why are subsoil drainage systems important in New Zealand?
New Zealand’s diverse climate and soil types can lead to significant water accumulation in certain areas. Subsoil drainage systems help manage this excess water, preventing issues such as basement flooding, foundation damage, and soil erosion, thus maintaining the structural integrity of properties.
How do I know if my property needs a subsoil drainage system?
Common signs that your property may need a subsoil drainage system include persistent waterlogged soil, dampness in basements or crawl spaces, mold growth, and foundation cracks. If you notice any of these issues, it’s advisable to consult a professional for an assessment.
What factors should be considered in the design of a subsoil drainage system?
Key factors include the type of soil, the slope of the land, the expected volume of water, and local regulations. Proper planning ensures that the system effectively directs water away from structures and prevents waterlogging.
What materials are used in a subsoil drainage system?
A typical subsoil drainage system uses perforated pipes, drainage aggregate such as gravel, and filter fabric to prevent soil and debris from clogging the pipes. The choice of materials can impact the system’s efficiency and longevity.
Can I install a subsoil drainage system myself?
While it’s possible to install a subsoil drainage system yourself, it requires careful planning and precise execution. Hiring a professional ensures that the system is designed and installed correctly, meeting local regulations and providing long-term effectiveness.
What are the common challenges during the installation of a subsoil drainage system?
Common challenges include dealing with unexpected soil conditions, ensuring the correct slope for water flow, avoiding damage to existing structures or utilities, and properly backfilling the trenches. Professional installers are equipped to handle these challenges efficiently.
How do I maintain a subsoil drainage system?
Regular maintenance includes checking for blockages, ensuring that the pipes are clear and functional, and inspecting the system for any signs of damage or wear. Routine maintenance helps extend the life of the system and ensures it operates effectively.
How long does a subsoil drainage system last?
With proper design, installation, and maintenance, a subsoil drainage system can last several decades. The longevity depends on the quality of materials used and how well the system is maintained over time.
How much does it cost to install a subsoil drainage system in New Zealand?
The cost varies based on the size of the area, soil type, complexity of the installation, and materials used. On average, homeowners can expect to pay between $5,000 and $15,000. Obtaining quotes from several professional installers can provide a more accurate estimate for your specific needs.
Conclusion
In summary, we’ve explored the various factors affecting the cost of drainage in New Zealand, from initial assessment to the final implementation. It’s crucial to understand these elements to make informed decisions for your drainage projects. We encourage you to assess your drainage needs thoroughly and consult with professionals to ensure your system is effective and compliant with local regulations. For more in-depth information, consider reviewing additional resources such as local government guidelines, comprehensive drainage guides, and contact information for qualified professionals. Taking these steps will help you achieve a reliable and efficient drainage solution tailored to your specific requirements.
About the Author:
Mike Veail is a recognized digital marketing expert with over 6 years of experience in helping tradespeople and small businesses thrive online. A former quantity surveyor, Mike combines deep industry knowledge with hands-on expertise in SEO and Google Ads. His marketing strategies are tailored to the specific needs of the trades sector, helping businesses increase visibility and generate more leads through proven, ethical methods.
Mike has successfully partnered with numerous companies, establishing a track record of delivering measurable results. His work has been featured across various platforms that showcase his expertise in lead generation and online marketing for the trades sector.
Learn more about Mike's experience and services at https://theleadguy.online or follow him on social media:
